Friday, December 9, 2011

December Ordering Special


December Ordering Special... (good only Friday and Saturday December 9-10) Orders will be here in time for Christmas
 
Order $25 receive free ink pad OR Order $50 receive a free level 2 paper pack or "b" stamp set OR order $75 receive a free "C" stamp set OR order $100 and receive a free "D" set. (free gifts are not cumulative and order total is before taxes and shipping)

Contact me today to get in on this special.  (Also free gift wrap with a $50 order)

Thursday, December 1, 2011

Winter Wonderland WOTG

This is my version of the Winter Wonderland workshop on the go!  Hope you can attend.  It's tonight at 7:00 pm at my house:) 
This one isn't quite finished.. just needs a bit of embellishment...

Monday, November 28, 2011

Sprucing up Cricut Art Philosophy Cuts

By Joy McHargue (my Texas friend:)  thanks for sharing Joy:)


Cricut shapes and cut-outs look flat and boring straight off the cutting mat. These are some simple steps to give your Cricut Art Philosophy cuts more pizzazz.
Note: for cutting examples, I use the keypad system 1-10 across and A-E down. So the Cupcake would be Shift E10, for example. Idea Book examples are from the Fall/Winter 2011 book.

Ink:
• Sponge dauber the edge- same tone, darker, or even a lighter pigment (card p74)
• DTP or direct to paper: My favorite looks is running the cut at a 90 degree angle which gives just the edge depth-this works best with a strong dark color. (winter card p 74)
• You can also DTP edge distress with ink of any color for that shabby chic look. (p19 WOTG pages)
• Stamp on the cuts: flourishes and background images work very well, but random stamping a literal image like flowers look great also! (p 27 card)
• Texture tools and stippling: best to use a good contrast color to give texture.
• Stamp underneath a cricut shape (pocket p 108)

Layering:
• Use the layer function on the cartridge to add a framed look: cut at same size for layer to go on top, cut ¼” larger for layer to go outside the first cut. (card p 64)
• Decorative layers make great frames for many cuts- refer to p 72 booklet.
• Add ¼” to original cut in a different color paper/CS to make a sort of mat. Note: not all images cut to make a precise ¼” border so do a test cut first-works well for squared and circular but not as well for ovals and rectangular shapes.
• Glue cut to CS and hand cut a mat.
• Layer with strips, squares, and/or circles under your Cricut shape to pop up your shape. (card p 30 , p51)
• Make several layers, graduating sizes like flowers ( card p87)
• Use foam tape to pop Circuit shape.
• Offset layers (p15 flourish on card)

Accessories:
• Tie it up: hemp, ribbon, floss, waxy flax (banner p106))
• Sparkles, glitter, brads, buttons, pearls
• Liquid appliqué- this looks really nice on card cutouts like snowflakes (Shift+card A10) with glitter added while wet.
• Sanding/edge distress your shapes. (card p57)
• Glitz is a super easy way to add depth!

Special note: Card cut outs- usually done with shift +card function really need attention- use two or more of these to ramp up this type of cut (I love you card p 88)
• Add a frame from a layer cut- look on page 71-72 to find a suitable shape.
Example: shift+card E10 cutout card would be framed nicely with squared frames like Layer E3, Layer B4, and several others. Decorative layer D3.
• Sponge dauber the edge of the cutout lightly
• Put patterned paper behind the cutout- finish inside with a frame around that piece for dauber.
• Glitz around edge or liquid appliqué

Monday, November 21, 2011

Believe WOTG

Finally posting these layouts!  I love the simplicity of these pages. Join us on December 1st as we work on the Winter Wonderland WOTG. 


This layout has been redesigned and uses the Cricut to cut out the letters... Holiday Hoopla.  I cut out the red bows and added them for a fun splash of color.


Wednesday, November 16, 2011

Hostess Club

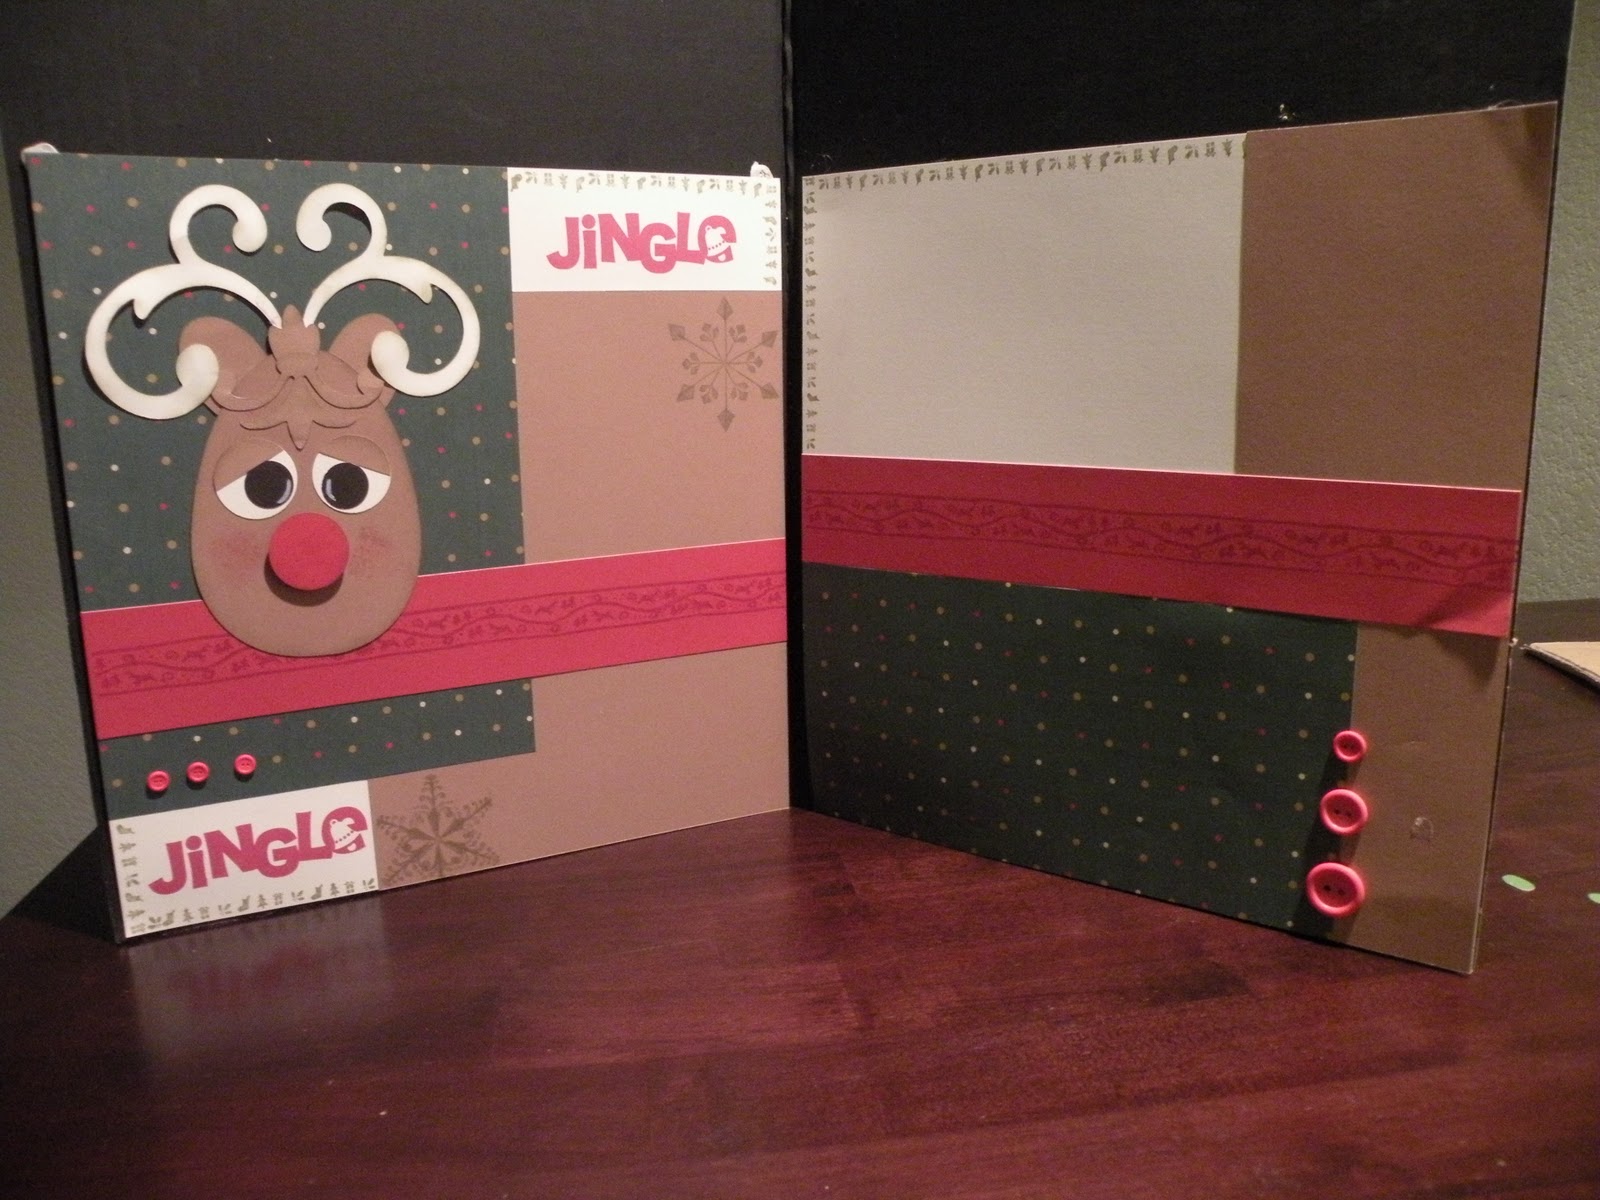
Hostess Club is a monthly event that we get together and create a two page layout, place an order, and take turns being the hostess (and getting the hostess rewards!!!)  This month we used the CTMH Art Philosophy Cricut Cartridge to create this darling reindeer to add fun to the layout!  (This was inspired by one of my CTMH Sisters... Tracey Sanders) 

We used the Sweet Symphony layout from the imagine book as inspiration.  It was great to see the different color schemes. (and somehow Roxxy left before a photo could be taken)

Come back soon for Snowman and Santa images also inspired by Tracy with instructions as well.  Love that AP Cricut Cartridge!!!

New clubs will be starting in January (January 17th)... are you interested?  We will meet the third Tuesday of each month at 7:00pm at my house.  There will be a two page layout to inspire you.  Guests are always welcome.  Remember to bring a basic kit (adhesive, scissors, cutter and blocks).


These are the pieces parts of the Reindeer!
egg shape head (shape 9) 5 inches
oval ears (oval 3) 1.25 inches (cut 2)
Nose, eyes, lids (not shown) circle 1.25 cut 2 eyes, 1 lid (cut in half for lids)
eyeballs cut .75 in circle (cut 2)
page 32 accent shift 3.50 and cut apart
page 50 shift font layer 3.5 (cut 2)

This is the final project after everything is sponged. (added red sponging to his cheeks after the photo was taken)

Alicia's page


Dulce's page

Kelly's page

Tami's page

Thursday, November 10, 2011

Christmas Ornament

This is a glass Christmas Ornament I did a few years ago. 

I stamped an image using archival black ink (so it doesn't run) on white tissue paper and used colored pencils to color in the image.  Carefully remove the topper.  Next, add a couple drops of magic bubble on the inside of the ornament.  Roll the tissue paper to fit in the ornament and used a q tip to place the image.  (this may be a bit tedious as it is delicate). 

Once the image is placed, add more bubble magic and swirl about the ball until it's mostly covered with the substance.  Then add the glitter and swirl that to cover the ball.  you may add more bubble magic and glitter as needed.

Allow to dry before putting the top back in.

Wednesday, November 9, 2011

French Fry Box

this darling french fry box was cut on the cricut using the art philosophy cartridge (and so were the stars)  I love that we have stamps that coordinate with the CTMH cartridge. By adding a small card that can be tucked inside, it makes an adorable gift tag.  Would you like to make one?  Let me know!